[Tutorial] Using prose.io for posting
prose.io provides a very easy to use, minimal, yet intuitive interface, allowing even people without git know-how, to easily wade through their site files and make edits, or create new posts. The separate metadata entry mechanism is nice, and the preview functionality gives one an opportunity to inspect stuff, before committing their changes/posts.
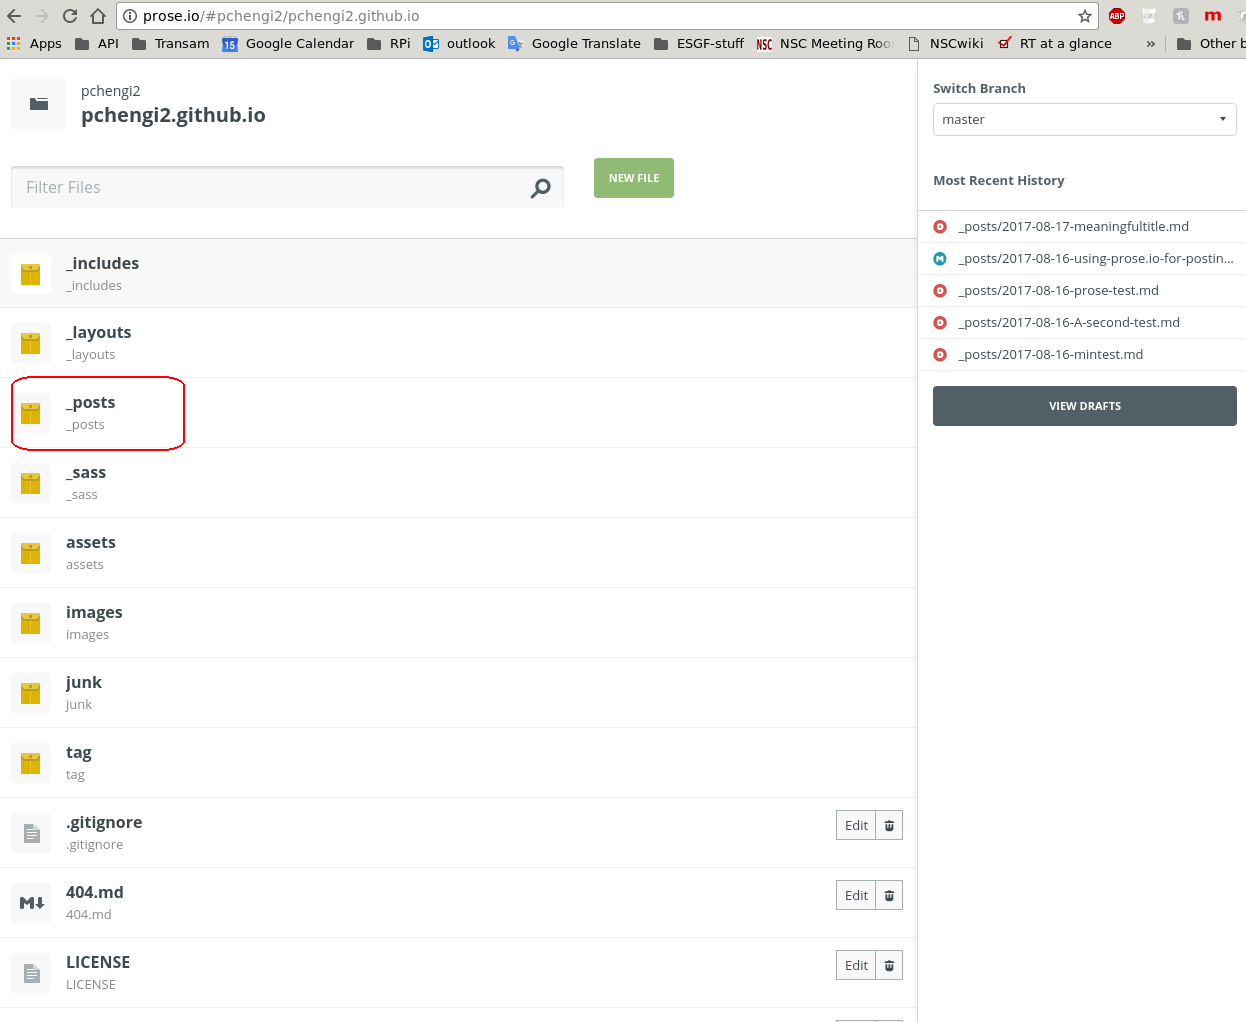
Login into prose.io, select your repository, and select the _posts directory.
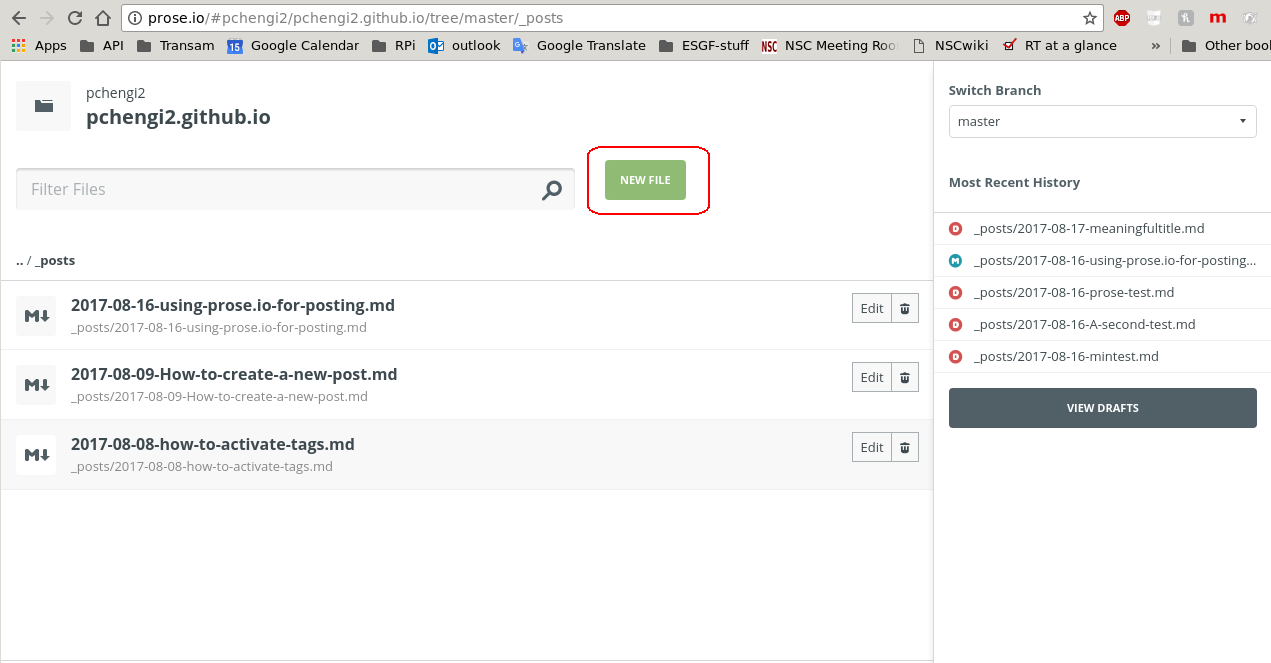
..and click on the ‘New File’ button, to create a new post.
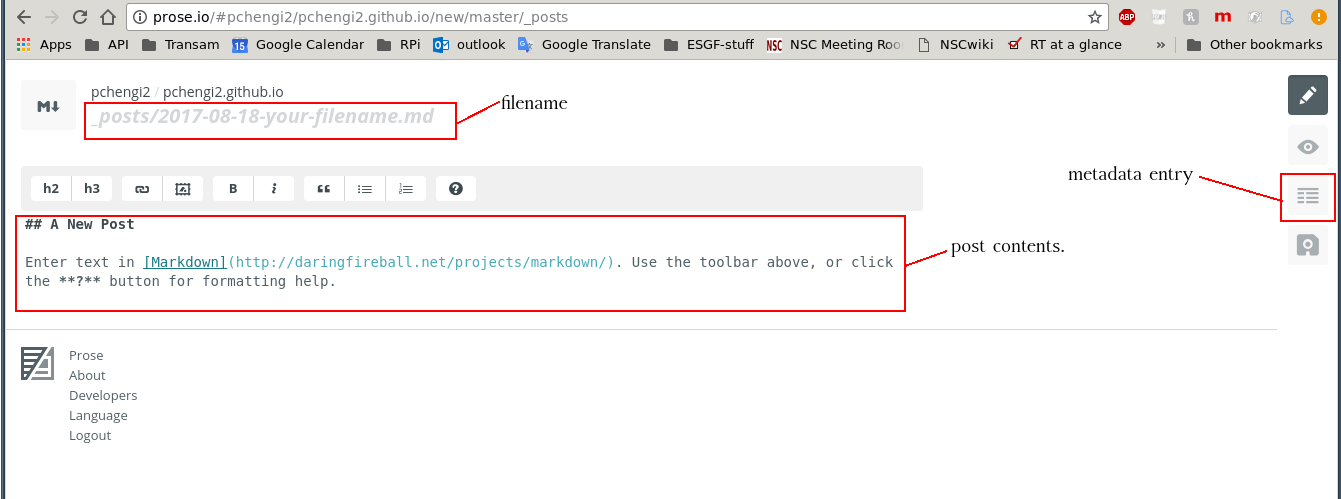
The filename is prepped for use; select it and change it to something relevant to your post. Also shown is the text box, where you enter your post contents, and the button, to launch the metadata entry page.
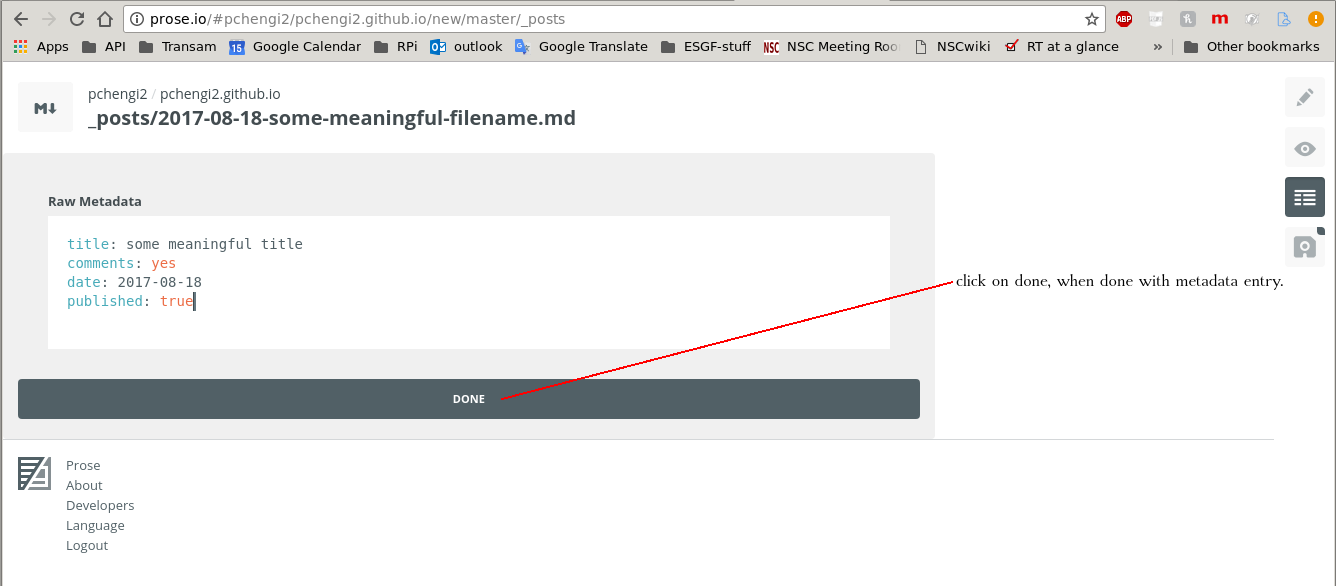
Shown below are the basic tags you’d need, with every post. Click on ‘Done’ when you are done with metadata entry.
You can now key in the actual post contents, and when done, click on the save button.

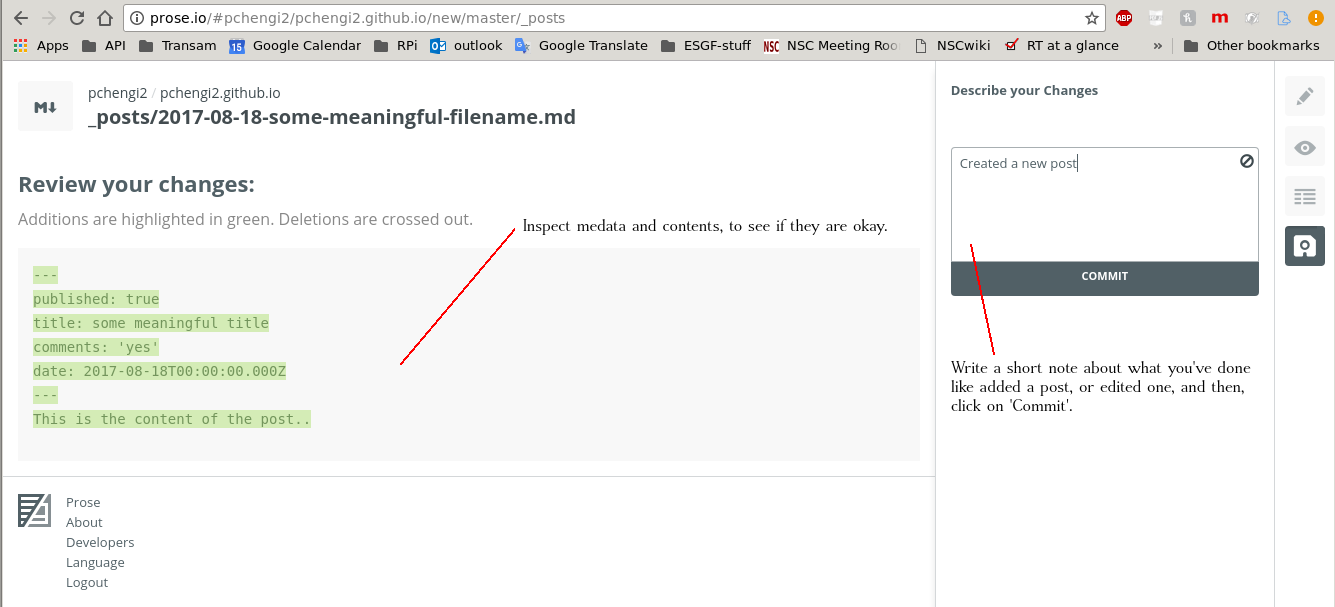
You can review your post contents, and the metadata. If you spot something amiss, you can click on the metadata button to correct the metadata, click on Done, to be brought back to the post page, and when you are satisfied, you can click on the save button again, to come back to this page. When you are ready to commit, enter a brief note in the text box on the right, explaining what you’ve done, and click on ‘Commit’. This should now be committed back to github.
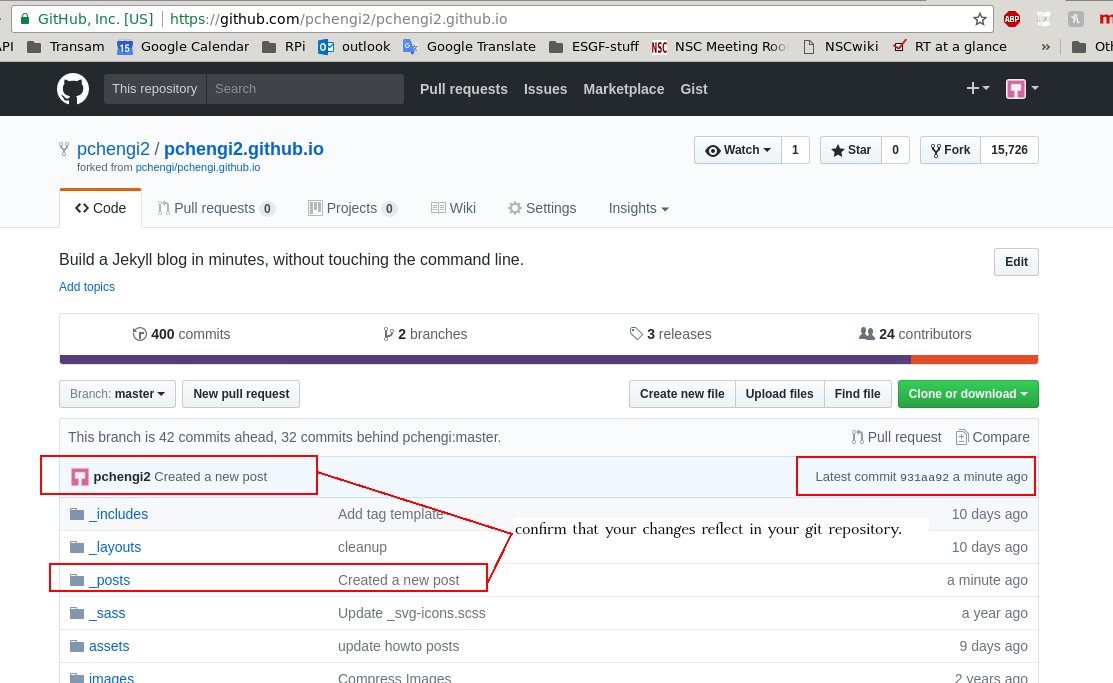
You should now head over to github, to confirm your changes have been committed. You can confirm by looking for your commit message, and timestamp.
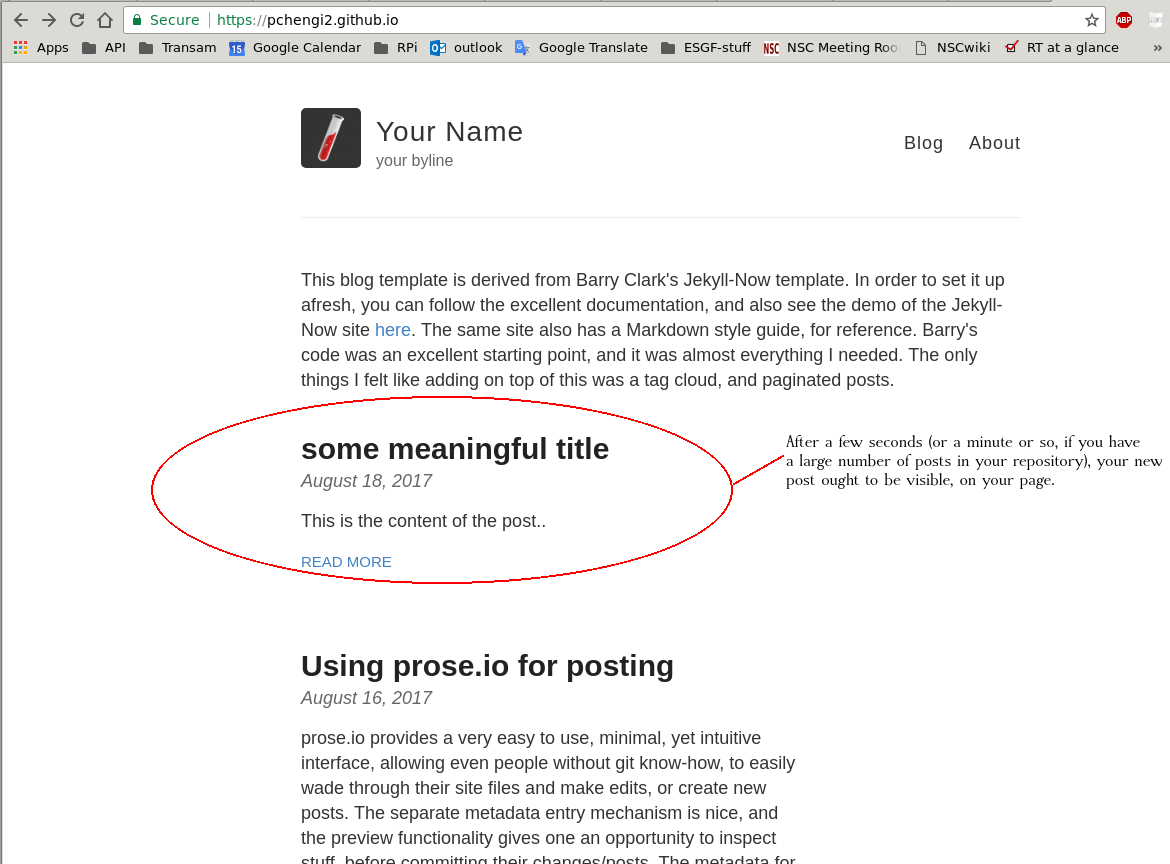
Now, give it a few seconds (or a couple of minutes, if you have several hundred or thousands of posts in your repository), and your new post should be visible on your github.io page.